Home › Forums › General Discussion › How to download and install TNT VPN for free
- This topic has 6 replies, 4 voices, and was last updated 5 years, 1 month ago by
Ammar.
-
AuthorPosts
-
-
September 11, 2018 at 7:08 pm #665
Ammar
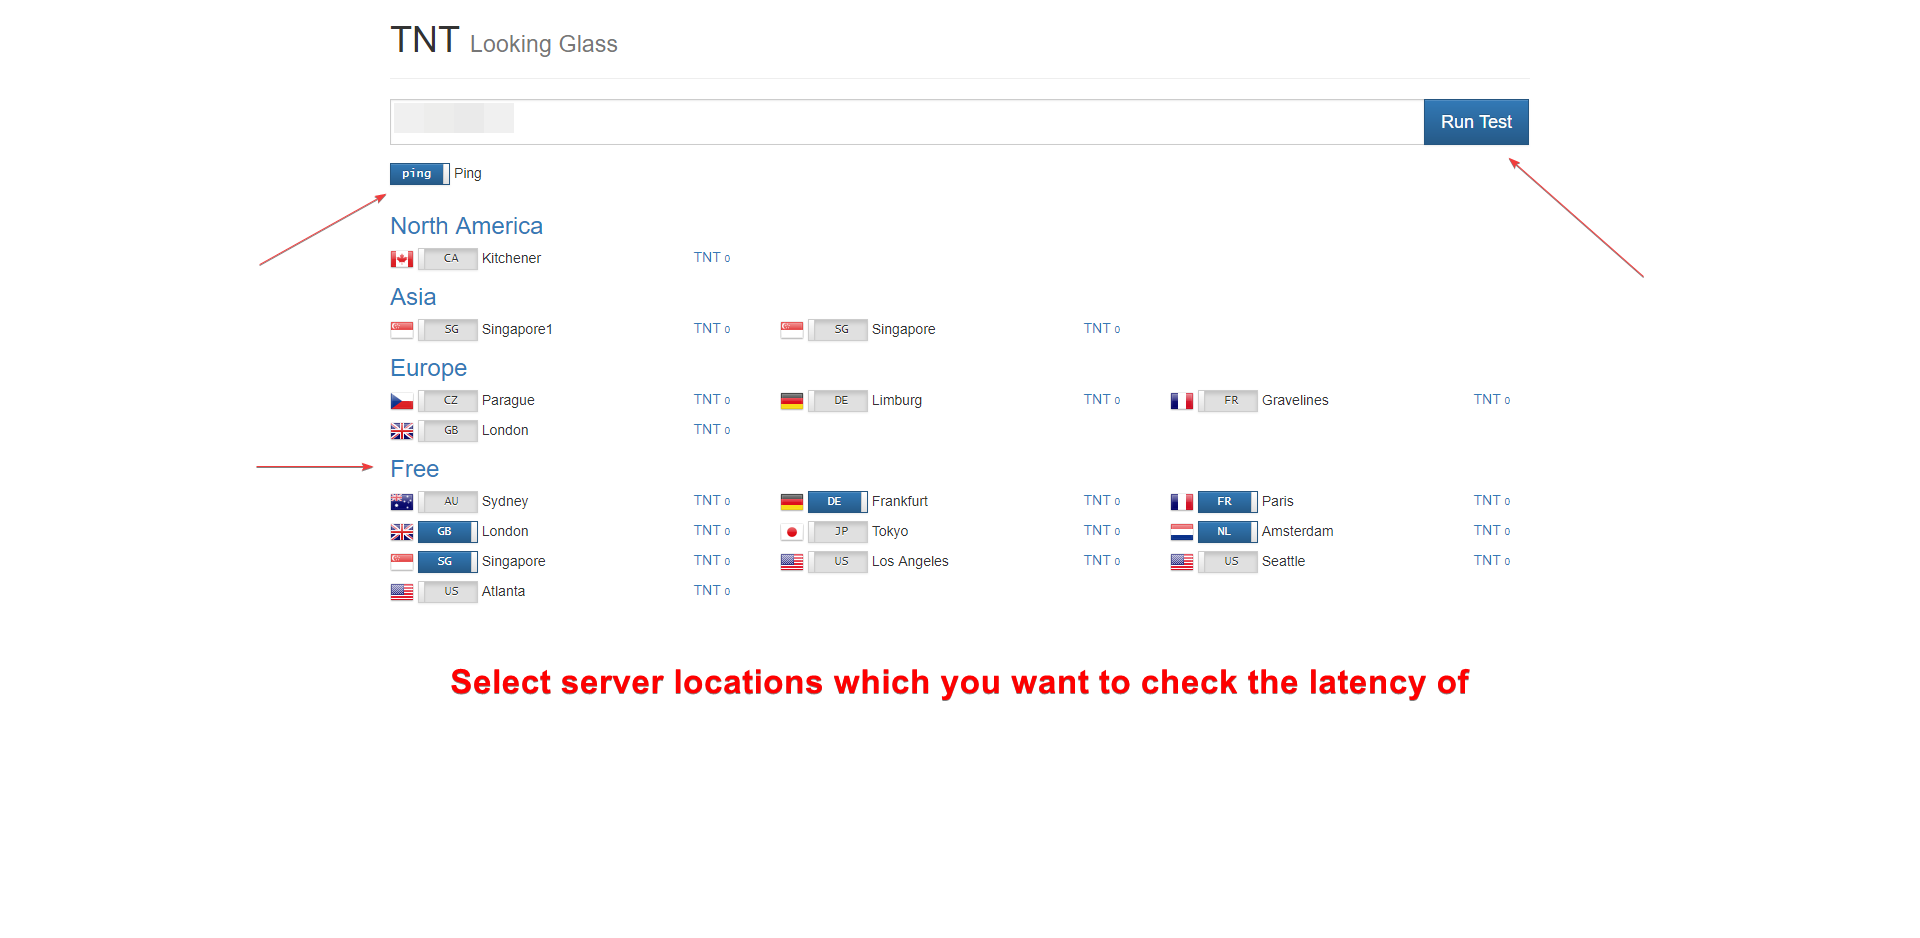
KeymasterFirst, we have to check what our ping(latency) will be while using the VPN because there is no point in using the VPN if you get high or worse than your normal ping. To do so, please go to https://lg.thenoobstribe.ga and then click on ping, select your desired servers under the “Free” tab and click on “Run Test”.
Note: It’s better to select 1 server at a time as it will give you the best avg, results.
After the test finishes, you have to look for the “time=XYZ ms” and that will be your ping or you can just look at the avg. ping at the bottom of the result.
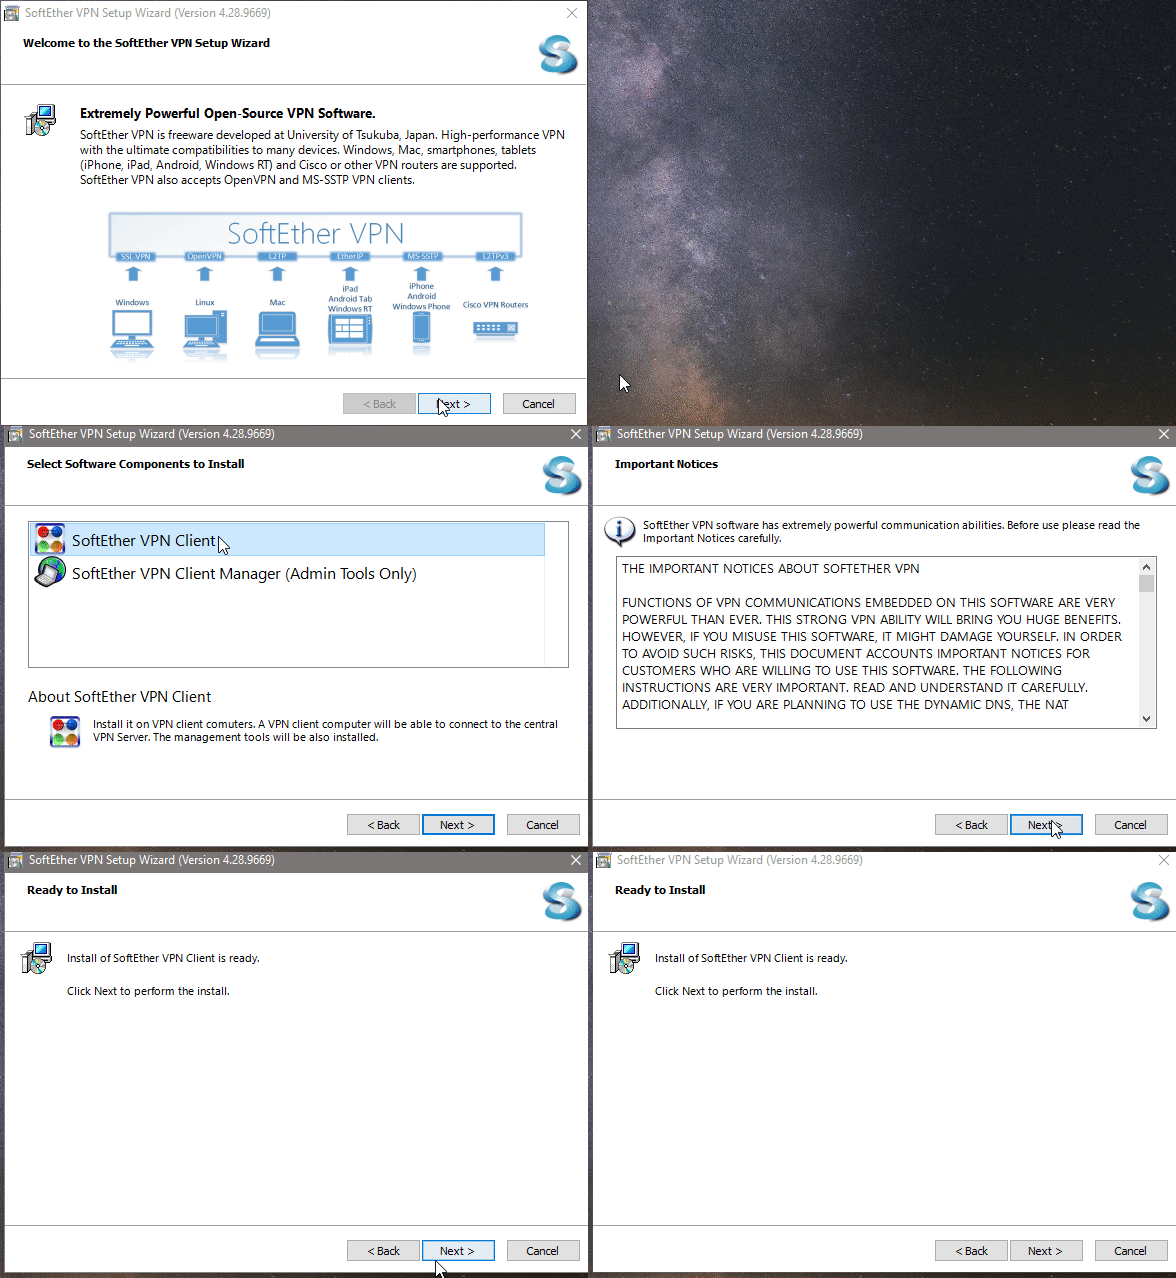
After finding your best(lowest) latency VPN server, go to https://thenoobstribe.ga/product/virtual-private-network-vpn/ , place an order and use the coupon code “Noob” at the checkout which will give you a 100% discount(free). After that you will be provided with the download link. If you can’t find the download link, alternatively, you can go to Members–My account–Downloads and download the VPN client and install it.
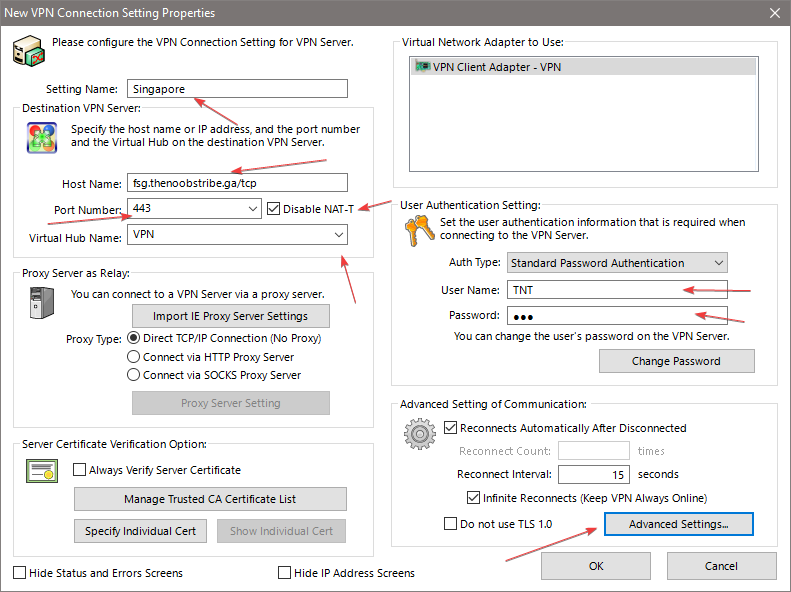
After installing it, open the VPN client from your desktop and click on “Add VPN Connection” and it will prompt you to create a virtual network adaptor first, just click ok and when it’s all done, click on “Add VPN Connection” again. Now enter the server details to add the VPN connection profile. For the sake of the example, I’ll be using the Singapore server. Enter anything in setting name and enter “HOSTNAME OF THE SERVER”. In my case, I will have to enter fsg.thenoobstribe.ga and then click on the “Disable NAT-T” and select “VPN” as the Virtual Hub name from the drop-down menu. Enter “TNT” as username and password and click on “advanced settings”.
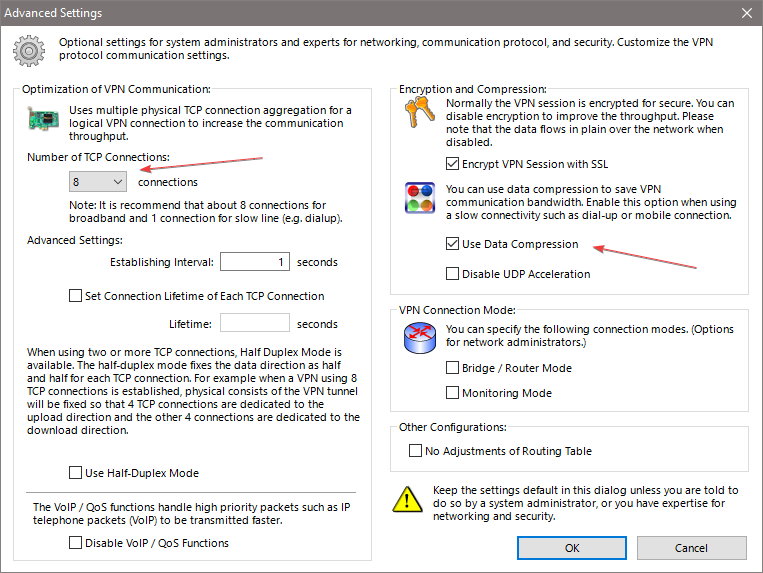
After that select “8” number of connections from the drop-down menu and check the “use data compression” option and click “OK” and then click “OK” again.
Now just select the newly made VPN profile and right click on that and click on connect and you will be connected to that server. Enjoy!
P.S. Enter the correct hostname/IP for your chosen VPN location. Below you can find the hostnames/IP of the servers:
- Australia(Sydney): fau.thenoobstribe.ga
-
Germany(Frankfurt): fde.thenoobstribe.ga
-
France(Paris): ffr.thenoobstribe.ga
-
United Kingdom(London): fgb.thenoobstribe.ga
-
Japan(Tokyo): fjp.thenoobstribe.ga
-
Netherlands(Amsterdam): fnl.thenoobstribe.ga
-
Singapore(Singapore): fsg.thenoobstribe.ga
-
United States(Los Angeles): fus2.thenoobstribe.ga
-
United States(Seattle): fus3.thenoobstribe.ga
-
United States(Atlanta): fus1.thenoobstribe.ga
If you don’t understand anything or you need help, please ask for help here on the forum as no help will be provided via any other medium(Facebook etc).
Cheers!
-
This topic was modified 6 years, 8 months ago by
Ammar.
-
This topic was modified 6 years, 8 months ago by
Ammar.
-
This topic was modified 6 years, 8 months ago by
Ammar.
-
This topic was modified 6 years, 8 months ago by
Ammar.
-
This topic was modified 6 years, 8 months ago by
Ammar. Reason: Final
-
This topic was modified 6 years, 8 months ago by
Ammar.
-
This topic was modified 5 years, 1 month ago by
Ammar. Reason: fixed image links
-
September 12, 2018 at 8:27 pm #683
Beast10734
ParticipantWhenever I run ping test, I always get 100% packet loss and all the servers have the same ping. I am using fiberlink, lahore.
-
September 16, 2018 at 11:53 pm #698
Sherlock
Participanti’m also having the 100% packet loss error
how can this be resolved? -
March 29, 2020 at 9:34 pm #1374
Basitgujjar
ParticipantUnable to connect
-
-
AuthorPosts
- You must be logged in to reply to this topic.
Share this:
- Click to print (Opens in new window) Print
- Click to share on Facebook (Opens in new window) Facebook
- Click to share on LinkedIn (Opens in new window) LinkedIn
- Click to share on Reddit (Opens in new window) Reddit
- Click to share on X (Opens in new window) X
- Click to share on Tumblr (Opens in new window) Tumblr
- Click to share on Pinterest (Opens in new window) Pinterest
- Click to share on Pocket (Opens in new window) Pocket
- Click to share on Telegram (Opens in new window) Telegram
- Click to share on WhatsApp (Opens in new window) WhatsApp


